As summer temperatures in the USA continue to break records, the reliance on energy-hungry HVAC systems has reached a breaking point—both for our wallets and the power grid. But what if I told you that some of the most effective cooling technology wasn’t invented in a lab, but perfected in the ancient deserts of Persia and the high-altitude dwellings of the Southwest?
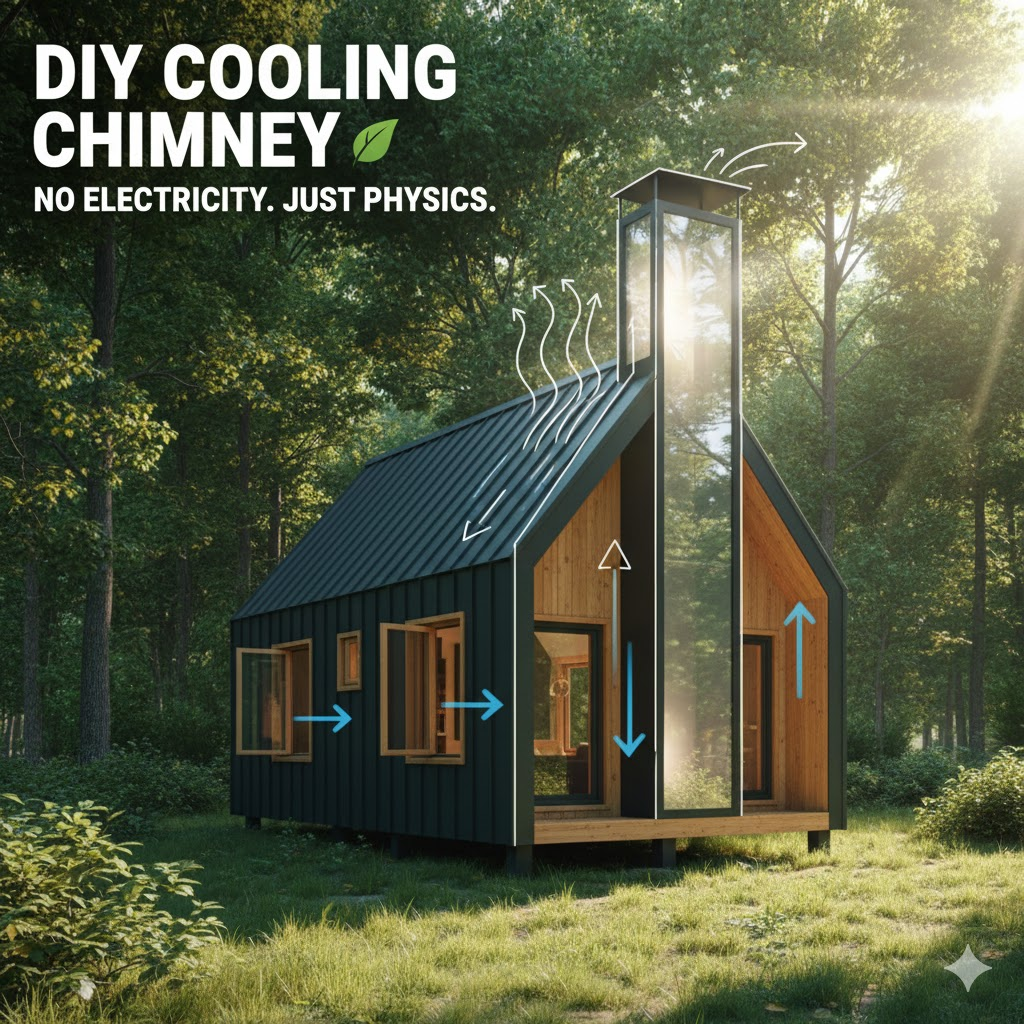
Enter the Passive Cooling Chimney (also known as a Thermal Chimney or Solar Chimney). It is a zero-electricity, silent, and incredibly effective way to vent hot air out of a small home while pulling fresh, cool air in. For a tiny house, a cabin, or a compact urban dwelling, this is the ultimate sustainable DIY project.
Here is how to design and build a passive cooling system that works with physics, not against it.
The Science: The Stack Effect and Thermodynamics
To build a chimney that actually cools, you need to understand two principles:
- Convection: Hot air is less dense than cold air. It wants to rise.
- The Stack Effect: By creating a vertical shaft, you create a pressure differential. As hot air escapes through the top of the chimney, it creates a vacuum at the bottom that “sucks” cooler air into the house through windows or floor vents.
In a small home, this effect is amplified because there is less volume of air to move, meaning you can achieve a total “air change” every few minutes.
Design Phase: The Three Golden Rules
Before you grab a saw, your cooling chimney must meet these three criteria to be effective:
- Height Matters: The taller the chimney, the stronger the draft. Aim for at least 4 to 6 feet above your roofline.
- Thermal Mass/Absorption: The “sun-facing” side of the chimney should be designed to get hot. The hotter the air inside the chimney, the faster it rises.
- Intake Location: Your fresh air intakes must be on the shaded side of the house or utilize “earth tubes” (underground pipes) for maximum cooling.
Materials You’ll Need
- The Shaft: 12-inch or 14-inch diameter galvanized steel ducting (lightweight and heat-conductive) or a wooden frame box lined with metal.
- Glazing: A sheet of clear polycarbonate or plexiglass for the solar-facing side.
- Absorber: Matte black high-heat paint.
- Insulation: Rigid foam board (for the non-solar sides of the chimney to keep the heat trapped inside the shaft).
- Sealing: High-temp silicone caulk and flashing to prevent roof leaks.
- Screening: Fine insect mesh for the top and bottom openings.
Step-by-Step Construction Guide
Step 1: Selecting the Location
Identify the south-facing wall (if you’re in the Northern Hemisphere) or a spot on the roof that receives the most consistent afternoon sun. The chimney needs solar gain to “prime the pump” of air movement.
Step 2: Constructing the Solar Collector
Build a rectangular box. The back and sides should be insulated wood or metal, but the front (south-facing) side must be clear polycarbonate.
- Paint the interior matte black. This ensures that when sunlight passes through the clear window, the heat is absorbed and trapped, superheating the air inside the shaft.
Step 3: Creating the Roof Penetration
This is the most intimidating part for DIYers. You will need to cut a hole in your ceiling and roof that matches the diameter of your chimney shaft.
- Pro Tip: Always place the chimney at the highest point of the ceiling. Since hot air collects at the peak, this ensures you are venting the hottest “stratified” air first.
Step 4: Installing the Shaft and Flashing
Slide your blackened metal duct through the roof. Secure it to the rafters. Use heavy-duty roof flashing and a generous amount of silicone sealant. At high altitudes or in windy areas, use guy-wires to stabilize the chimney’s protrusion above the roof.
Step 5: The Top Cap (The “Turbine” or Cowl)
You cannot leave the top open to rain. Install a “Whirlybird” turbine vent or a simple T-cap.
- Advanced Hack: Use a directional cowl that turns with the wind. This creates a “Venturi effect,” where the wind blowing over the chimney actually helps pull the air out from inside.
Step 6: Managing the Intake
A cooling chimney is useless if your house is airtight. You must open a window on the North (shaded) side of the house.
- The “Ground-Cooling” Combo: If you really want to level up, connect the intake to a 10-foot PVC pipe buried 3 feet underground. The earth’s constant temperature will pre-cool the air before it ever enters your home.
Maintenance and Seasonal Tuning
- Winter Mode: You must install a tight-sealing damper at the bottom of the chimney. If you don’t close it in the winter, your expensive heater will be fighting a losing battle as all your heat escapes out the cooling vent.
- Dusting: Every spring, clean the polycarbonate glazing. Dust reduces solar gain, which reduces the “pull” of the chimney.
- Screening: Check the insect mesh for clogs. Spiders love the warmth of a cooling chimney, and their webs can significantly restrict airflow.
Why This Beats a Portable AC Unit
- Silent Operation: No compressor hum. You only hear the faint rustle of moving air.
- Healthier Air: Instead of recycling the same stale air, you are constantly flushing the home with fresh, oxygenated outdoor air.
- Durability: No moving parts (if using a static cap) means nothing to break down. It is a 20-year solution.
Final Thoughts for Small Home Owners
In a 500-square-foot cabin, a well-built passive cooling chimney can drop the interior temperature by 10 to 15 degrees Fahrenheit without costing a penny in utilities. It transforms your home into a living, breathing organism that responds to the sun.
Building this requires a bit of “weekend warrior” bravery regarding your roof, but the payoff of a naturally cool, breezy home is worth every drop of sweat.